Appearance
Boodil payments app for Shopify
Installing the Boodil payments app on your shop allows your customers to pay via their bank with Boodil’s, open banking payment method. A Boodil merchant account is required. Test mode can be enabled for testing successful and unsuccessful payments.
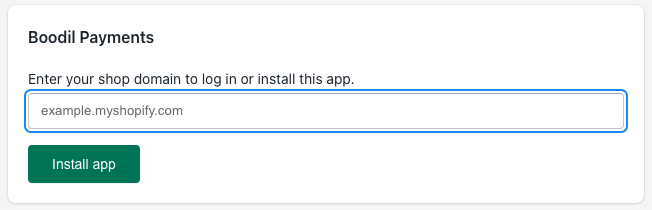
Installation on a shop
Installation is performed via install link. After typing in the shop's domain, Shopify will guide you through the process.
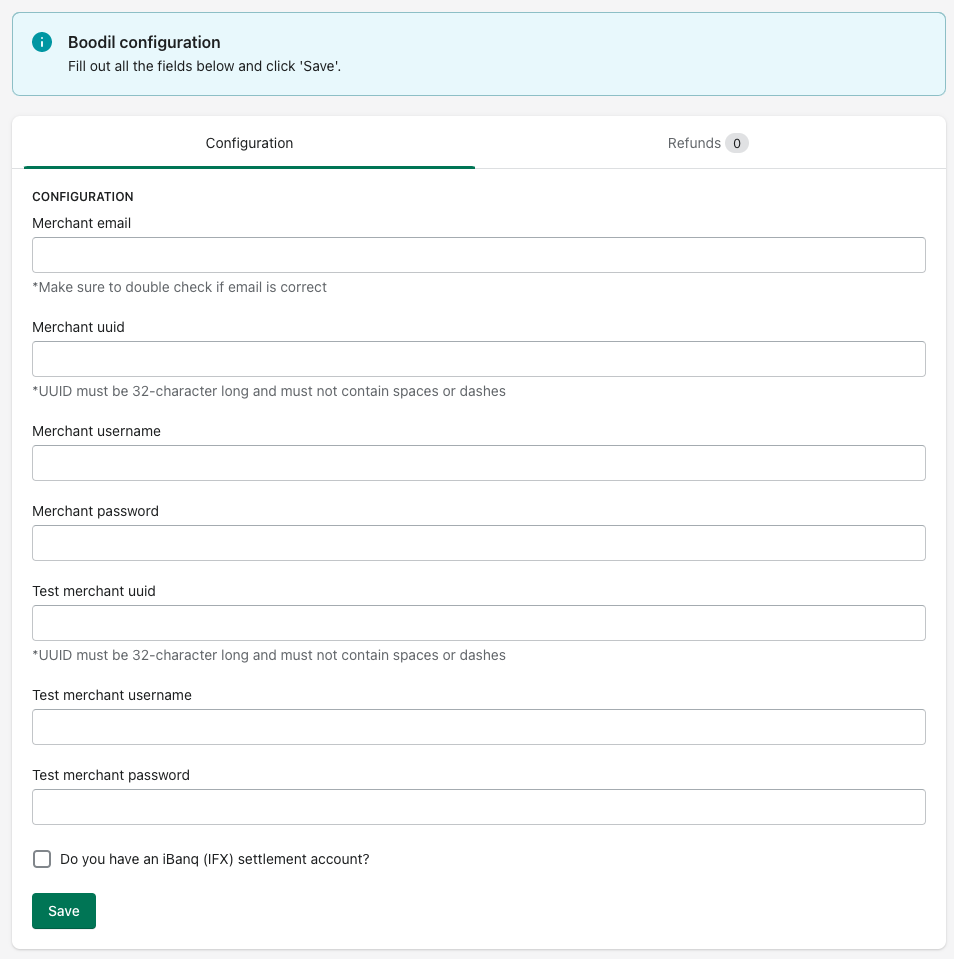
Configuration
Your Boodil account credentials must be saved on the app's configuration page to allow enabling the payment method. All fields are required.
If you input bad credentials, proceeding will not be possible and you will be asked to check the credentials and resubmit the form:

It is important to provide your valid email address here, since it will be used to process refunds and we can't verify it.
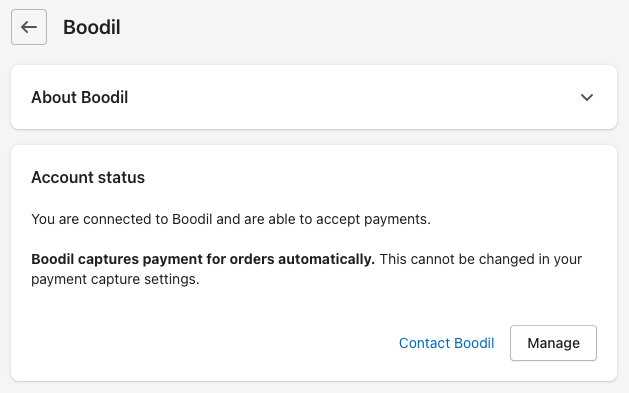
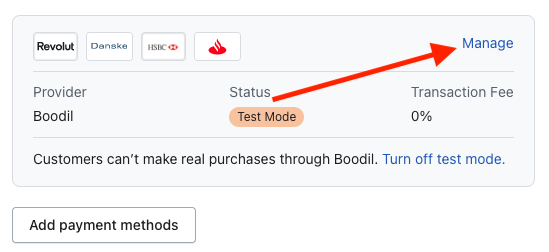
If necessary, the configuration form can be accessed via Shopify Admin. Click "Settings" > "Payments", then you can manage your Boodil credentials by clicking the "Manage" button on the displayed page.
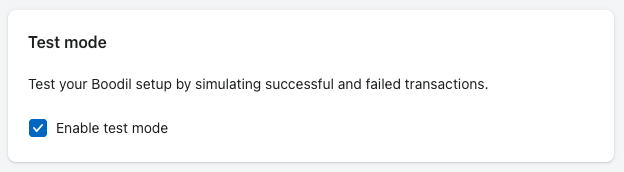
Test mode
Test mode can be enabled via Shopify Admin. Click "Settings" > "Payments", then you can enable test mode by ticking the "Enable test mode" box. Payments in test mode will go through Boodil's Test API.
Processing refunds
INFO
Given that Open Banking does not automatically support refunds, we have built a refund solution through merchants using an iBanq account. Alternatively, there is also a manual option too.
After proper configuration of the payment gateway and if there are refunds pending currently every 24 hours a CSV file will be sent to the merchant provided email address.
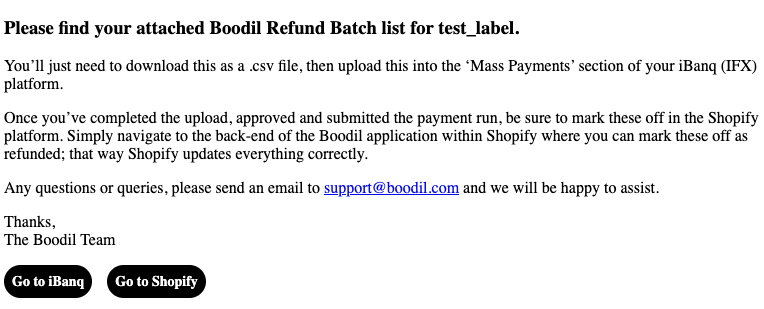
This file will contain everything necessary to process payments through "Mass Payments" with your iBanq account.
On the configuration page merchants are asked to confirm a "Do you have an iBanq (IFX) account" checkbox.

A) If you have an iBanq (IFX) account
TIP
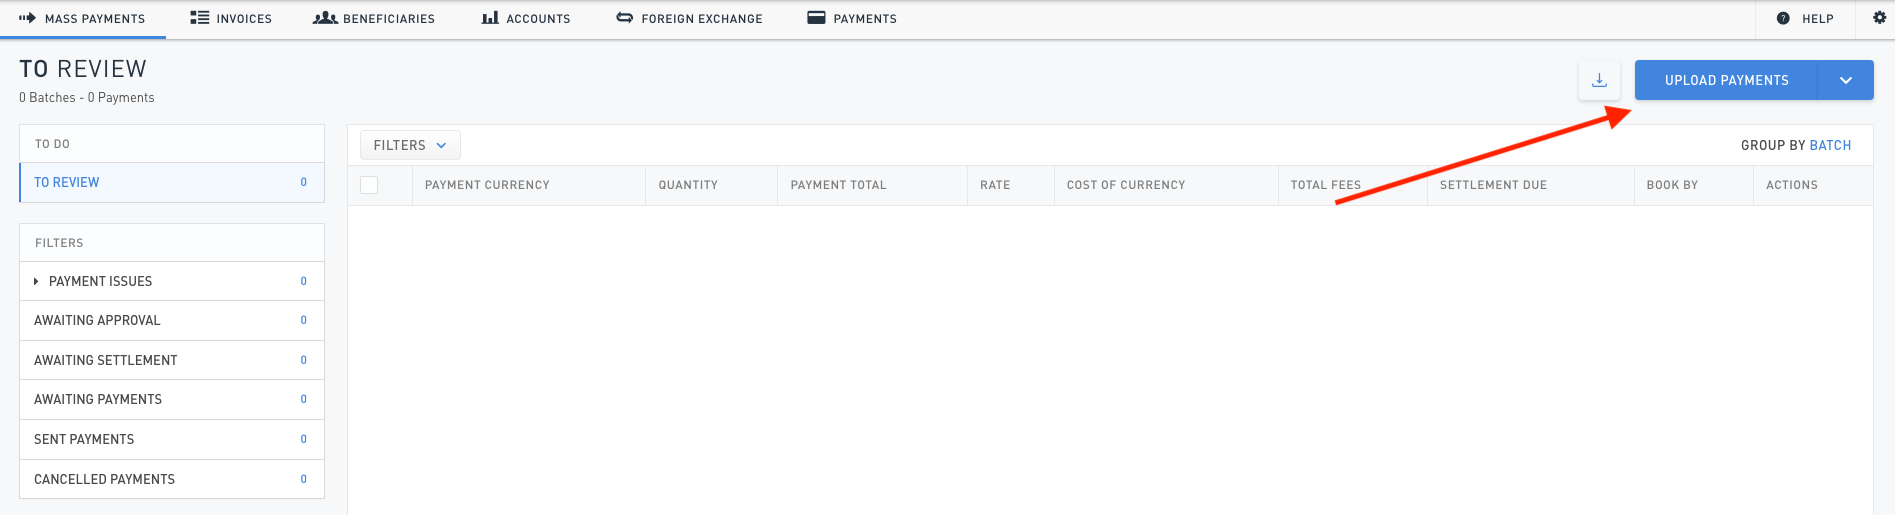
In this case merchant can upload received CSV file to mass payments section, making the process easier.
You can navigate to this page by clicking "Go to iBanq" button in your email.
The CSV file can be uploaded here.
After successfully sending payments through your bank account, you are also required to mark pending refunds as resolved.
In order to do that, you need to go to payment app configuration page.
TIP
Simply head to the URL provided in your everyday email containing CSV attachment.
You can also get there through your Shopify Admin Panel by clicking "Settings" at the left-bottom corner of the screen, heading to "Payments" tab on the left-hand side and clicking "Manage" under "Supported payment methods".
In the "Refunds" tab you will be presented with a full list of refunds which have been already sent to you via email. They are grouped by the name of the CSV file attachment from your email.
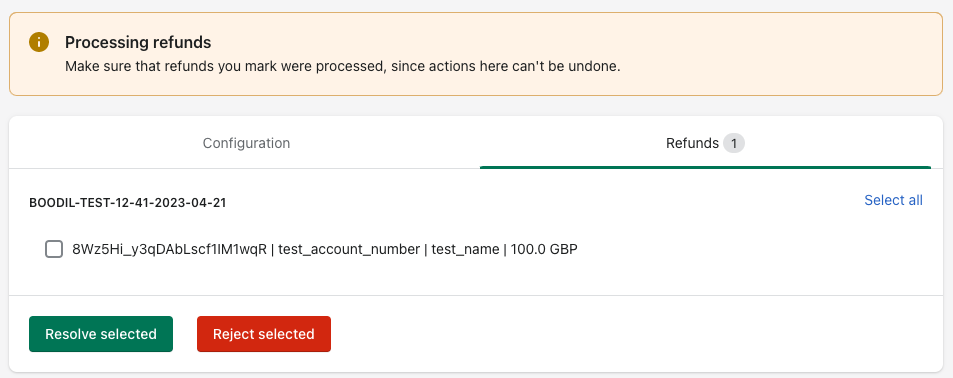
Here you can identify specific refunds by their reference number, customer name or amount. Either mark specific refunds as resolved (completed) or reject them.
Keep in mind all changes made here are ultimate and can’t be undone, so remember to double-check everything before submitting the choice.
B) If you don't have an iBanq (IFX) account
TIP
Merchants will need to contact a customer in order to obtain their bank account details, to process a refund manually. The daily CSV file containing all refunds will assist the merchant in providing a reference for the transaction.
After successfully sending payments through your bank account, you are also required to mark pending refunds as resolved.
In order to do that, you need to go to payment app configuration page.
TIP
Simply head to the URL provided in your everyday email containing CSV attachment.
You can also get there through your Shopify Admin Panel by clicking "Settings" at the left-bottom corner of the screen, heading to "Payments" tab on the left-hand side and clicking "Manage" under "Supported payment methods".
In the "Refunds" tab you will be presented with a full list of refunds which have been already sent to you via email. They are grouped by the name of the CSV file attachment from your email.
Here you can identify specific refunds by their reference number, customer name or amount. Either mark specific refunds as resolved (completed) or reject them.